Thinking about creating an explainer video for your product or service? This may be the best idea you’ve had all month. Explainer videos are an excellent way to engage your audience, introduce them to your product, and turn a potential customer into a client. That is - if you do it right.
Consider this: you only have about a minute to show folks what it is you’re selling and why exactly they should buy it. And, chances are, the video will be right there on your homepage, so it’ll be the site visitors’ first impression of your business. Which, you know what they say - first impressions matter, so you’ll need to get it right the first time.
So, while the length of an explainer video is short enough, putting it together takes more time and effort. In fact, the brevity of the video is why it’s so important to do your best when scripting and planning it, because everyone second counts. You’ll need to get creative and resourceful, so as to make an explainer video that’s engaging, fun, and reflects the tone of your business.
That’s what we’re here for - to show you how to make a great explainer video that will keep audiences hooked and increase your sales. We’ll guide you through the process of creating your very own explainer video, and we’ll also go over different types of explainer videos, what sort of video animation software you can use, as well as divulge a bunch of useful tips on how to be good at it all.
What Is an Explainer Video?
An explainer video is a brief video that explains the product or service offered by your company. The main intention of explainer videos is to market your product by introducing people to it in a quick, fun, and effective manner. Explainer videos are especially useful for startups that are yet to make a name for themselves, although any business could benefit from a good explainer video.
Of course, explainer videos are not just a how-to guide: they also tell the story of your business along with introducing your product, as showcased by the effective explainer video for Dollar Shave Club razors. This explainer video introduces the customer to the founder of the company, conveys its value proposition, and does so in a fun and edgy way, as it’s presented in a playful tone that’s quite likely to engage its target audience.
In general, explainer videos are embedded into your homepage or landing page. They can also be placed on your product’s page and shared on your business’ social media pages (Facebook, Twitter, Instagram, LinkedIn, etc.). You could also use an explainer video as an online ad.
With the increasing amount of content on the internet, users also have less time and concentration for any one piece - be it text or video. However, websites with distinct and easily accessible value propositions have higher visitor retention rates. And there’s something about video - probably that it requires minimal effort on the visitor’s part and includes visual as well as textual components - which makes it the preferred medium to communicate with potential clients. For instance, shoppers are more likely to share and like videos rather than text articles, and they’re 27 times more likely to click on a video ad rather than a banner ad.
That’s why explainer videos are key to getting through to your customers - they’re short, fun, and insanely effective. Just to give you an idea, DemoFlick had a press release in 2014 revealing that their explainer video had increased click-through rate by nearly 200%. That could be you. That will be you.
How Long Should an Explainer Video Be?
While different research has given varying results, the answer is quite simple: it depends on the purpose of your explainer video. In any case, you won’t have much time - so every second counts.
If you’re a relatively new company without much exposure and are looking to expand your customer base, your explainer video should be between 60 and 90 seconds. This is because in your case, your explainer video will include:
- An introduction, or “the problem,” which should last 5-10 seconds.
- Your value proposition, i.e. the solution - that is your product or service, which should again last 5-10 seconds.
- How your product/service works, and in what ways it will benefit your customer, which should last 30-50 seconds.
- Finally, your call to action (CTA), which should last 10 seconds.
When you add these parts up, they amount to 60-90 seconds.
Now, the case is different if you’re an already well-known company that needs no introductions with a large existing client base and social media outreach. In this case, you wouldn’t need to engage the consumers’ emotions - they already like you. Your explainer video’s purpose would be simply to market a new product or service. In this case, your video can last up to 30 seconds and still suffice. All you’d need to do is quickly present the new product and flash your logo at the end.
However, if you’re already popular with your client base, you can also get away with an explainer video that’s 2 minutes or longer. Again, this is for videos meant to explain new products, features, or services, but ones that have more specs and need more time to divulge the details elegantly to the customers. Imagine if a popular tech company was releasing a new product. Existing customers would be eager to spend more than 2 minutes learning about the new features that come with it.
In conclusion, an explainer video that’s meant to shed light on your business as well as its products would last 60-90 seconds. If you have an existing loyal customer base, and are looking to introduce a new product, you can also create an explainer video that is shorter than 30 seconds or longer than 2 minutes.
With all that out of the way, let’s take a look at how you can create and host an amazing explainer video of your own.
How to Make an Explainer Video
The steps of making an explainer video are simple enough, but each of them demands a good deal of effort to get optimal results. And anything worth doing is worth doing well. In any case, all the hard work you’ll put in will pay out in the end.
1. Write a Good Script
No book, film, play, or commercial will be enjoyable without a good script. The same goes for explainer videos - you can’t have a good explainer video without a well-written script. You can spend a huge budget for fancy animations, but they won’t be able to hold their ground without a script that holds them together.
The biggest challenge with explainer video scripts is the fact that they need to convey a lot in a short amount of time. To properly tell your story, the video will need to include:
- An introduction to the problem;
- The solution - or your value proposition;
- How your product/service works and how it will be useful for your customers;
- A call to action, i.e. buy it, you guys.
You need to go over all these points in less than 90 seconds (unless you fall into one of the other two categories of explainer videos which can last less than 30 seconds or more than 2 minutes). So you see how it follows that every word counts. If you don’t manage to hook people in within the first 10-20 seconds, you may not manage to keep their attention until the end.
When it comes to writing the script, there are two options: hiring outside professionals or doing it in-house.
Option 1: Hire a Professional Writer
Unless you’re confident and have some experience in producing scripts, you may wish to consider hiring a freelance writer or a company to write the script for you. To begin with, they’ll have the experience and knowledge of how to create explainer videos that are short and sweet. Additionally, hiring outside help will give you a fresh set of eyes that will look at your story in a new way, and thus be able to come up with a unique take on your company. This will help set up a fun and engaging tone for the video itself.
If you decide to outsource the entire explainer video to another business, you may get asked several questions about your business, your goals, and your mission. If you’re just hiring a writer, you’ll only need to worry about answering content-related queries. For instance, they may ask you things like:
- Explain your product or service in one to two sentences.
- What is your target audience?
- What problem/need would your product/service resolve?
- What are the main benefits of your product/service?
- How does it work?
- What is your call to action?
- What tone would you prefer for the video? (Funny, entertaining, professional, stylish, etc.)
- Do you have any preferences for the visual look?
Mull over the answers before making any decisions. Of course, if you’re on a low budget and want to do everything in-house, you’ll still need to go over these questions for yourself before you start writing the script. Which brings us to the second option.
Option 2: Do It Yourself (In-house)
That all being said, with enough work and team members keen to give your work a lookover, you yourself may just be the perfect person to write that script. After all, you know your target audience best and you also know your product best. You can also combine the two approaches - write the script yourself and then have a professional edit it.
So, when you begin writing the script think over:
- What’s your target audience like? Would they prefer a professional or a humorous tone?
- What problems do they face, and how can your product help them solve it?
- How can you explain the benefits of your product in the clearest way possible?
As you can see, it’s always a good idea to keep a close touch to your target audience. If you haven’t already conducted some customer surveys and research, doing it before getting started on your explainer video is a good idea.
In any case, this is a good outline to follow:
- Introduce the problem: what issue is your target audience facing?
- Offer the solution: your product/service will solve that problem.
- Give them the benefits: explain how your product works and what its benefits are.
- Your call to action: tell people where they can get your product/service, mention a discount, a money-back guarantee, or a free trial (if you’re offering one), etc.
You can also quickly mention any awards or positive feedback you’ve received in the past to build trust amongst new clients.
Keep in mind that your video should be short and concise. Avoid delving into the detailed features of your product; instead, focus on its benefits and what it can offer to your clients.
Tips on Writing the Script
Here are some easy tips you should take with you when drafting your script:
- Above all, keep it short, simple, and sweet.
- Do your best to tell a story that makes both your brand and your product seem relatable and interesting.
- Don’t cram it with technical words that you think your audience will find impressive. Listing the five layers of asteroid metal that make your knives the best ever for cutting celery won’t interest users the way you’d hope, especially if they find the terminology meaningless.
- Get to the crux of the matter - your key message - within the first 30 seconds of the video.
- Address people using the second person, like you, you’re, your, etc. It makes the audience feel closer to you and your brand.
- Don’t be too serious, and opt for something that sounds friendly and conversational.
- Put a unique spin on your product that will make sure it stays in the viewers’ minds. Even a seemingly boring topic - like a toilet deodorizer - can be perfectly entertaining in the right hands.
- Once you’ve decided on a tone, stick to it. But an occasional joke - even in a video with a professional tone - can still add to the overall experience.
2. Record Voiceover for Your Video
Once you’ve done a run of your script to make sure that it’s the desired length (60-90 seconds), it’s time to record the voiceover. You may also re-do the voiceover after completing the visuals, but it’s important to have it at the beginning so that you can plan the visual content accordingly. Also, you’ll be able to edit the voiceover in the end, using audio editing software (which we’ll go over).
When it comes to the voiceover, we recommend that you hire a professional voice actor. There are several routes you can try:
- Voices.com gives your actress to a whole network of professional actors from across the world. Shopify, Hulu, and Microsoft are some of the companies that have used talent from Voices.com. You can also get voiceover in multiple languages if you’re looking to expand to a global audience.
- Voice123 follows the same business model as Voice.com. You can find some of the top voice actors through their website. Coca Cola, Airbnb, and NBC are some of the companies that have used this service.
- If you’re on a tighter budget, you may wish to look at Fiverr. There are tons of different freelancers on Fiverr, and you can probably find a voice actor that will do a decent job for a wage that’s within your budget.
3. Produce and Edit Your Video
Again, there are several ways you can go about when producing the video for your explainer… video. You can do it yourself if you’re on a tight budget, or you can hire a freelancer or a company to do it for you.
Option 1: Do It Yourself
If you have some video editing skills and a good idea, you can produce the video by yourself. All you need is some explainer video editing software. There are lots of options, and some are free.
Where can I get the best explainer animation video done?
There are several websites that offer explainer video software, including making your own animations. Our top recommendations are:
- PowToon is easy to use and affordable, which makes it perfect for beginners. In fact, you can even take advantage of the free trial they offer to produce your explainer video. It’s also pretty neat that PowToon comes with several explainer video templates that you can use to get started.
 Some of PowToon’s many explainer video templates
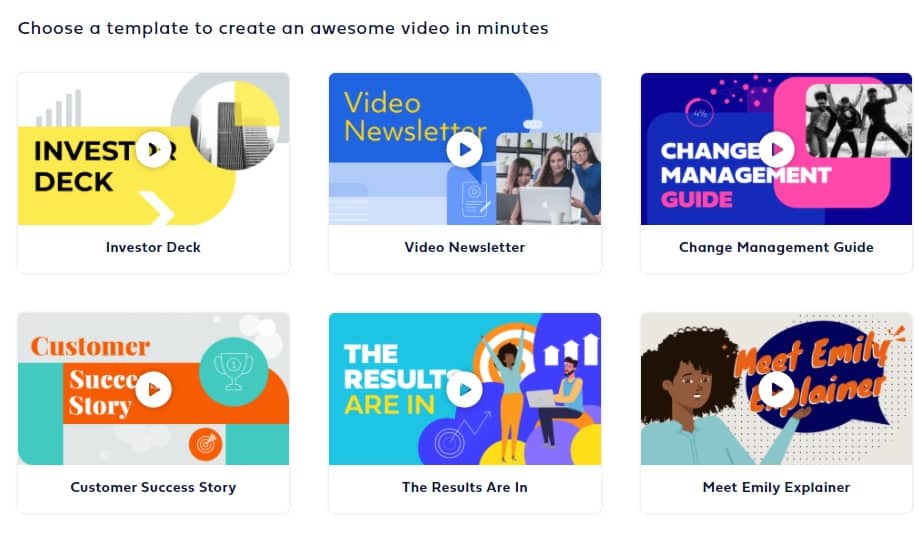
- Wideo also offers a free trial, and has some of the best animated video features you’ll find. Depending on your level of experience and how comfortable you are with fiddling with different settings, you can choose to use one of Wideo’s many templates or you can use their rich library of over 1,300 images and more than 50 music tracks to create a video that’s tailored to your directorial vision.
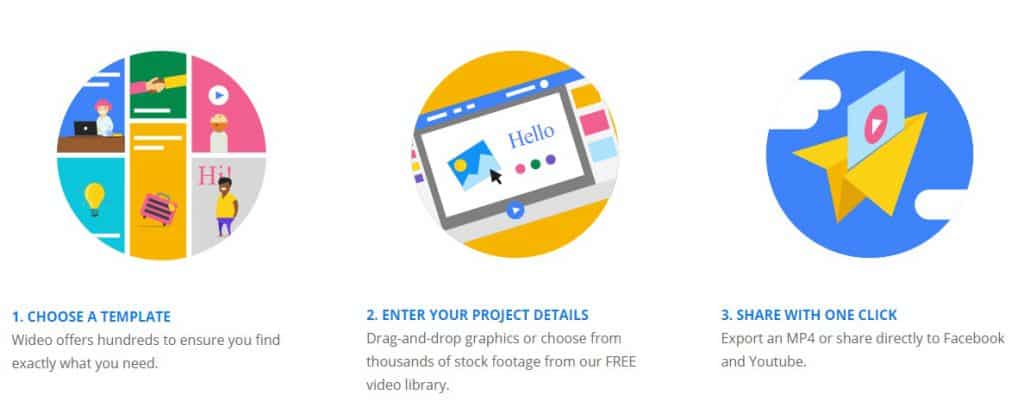 How you can create your own explainer video through Wideo.
Option 2: Hire a Company
There are lots of marketing companies that specialize in creating amazing explainer videos. However, this can get costly - explainer video production can cost anywhere from $1,500 all the way to $50,000. Of course, the price will depend on what elements you want in the video, and what that means for the production company (what resources and how many people will they need working on it, for instance). When thinking about how expensive an explainer video can get, however, keep in mind that a great explainer video eventually pays for itself, so to speak. You know, when you take increased sales into consideration and all that.
So, if you’re thinking about hiring a company to do the video production, we recommend looking at Demo Duck, Studio Pigeon, LessFilms, and Wyzowl. Some of these production companies have their own amazing explainer videos on the homepage, which show how good they are at what they do (personal favorite is Demo Duck’s).
Option 3: Hire a Freelancer
A freelancer is the midpoint between doing some of the work yourself and leaving other parts to a professional. So for instance, maybe you wrote the script yourself, but you want someone else to do the animation. Hiring a freelancer can help you strike a balance between working in-house and outsourcing parts of this project. Plus, it’s a lot cheaper than hiring a company. You can find a freelancer on any freelancing website. It’s always a good idea to look at their reviews and portfolios, so you can see if the quality is satisfactory and if the style resonates with your vision.
4. Edit the Sound
So - back to doing things in-house. Once you have the voiceover and video ready, it’s time to put it all together. However, the voiceover alone won’t do. You probably want some sound effects, and more importantly, music to accompany your video. You can find some (legally) free music at the Free Music Archive and MusOpen. Searching is easy - you can look for specific artists, song names, or genres. You can find free sounds on Freesound and lots of affordable sound effects at AudioJungle.
You’ll need some audio recording and editing software to put it all together. If you’re looking for feature-packed, premium products you can purchase Reason or Reaper. However, another great option is Audacity - it’s easy to use and free, open-source, and compatible with all major operating systems.
5. Publish Your Explainer Video and Measure Your Success
Now that you have the perfect script, voiceover, and animated video - and that you’ve put it all together - it’s time to publish it! Embed it on your home page, landing page, and products page, and make sure to share it across multiple social media networks, so your followers will be the first to know. You can also invest in an ad campaign, so your explainer video will appear as a targeted ad to your potential customers as they browse the internet.
Make sure to track and measure the success of your explainer video and see how people are engaging with it. Google Analytics and YouTube Insight can show you how many people have viewed the video, how many seconds of it they watched before moving on, and so on. Armed with this information, you should edit and tweak your video to improve its performance.