The internet has arguably made a lot of things more convenient for us. From paying bills, to online shopping, academic research, and entertainment - there’s little you can’t do with a computer and an internet connection.
However, this also means that we’re sharing a lot of personal data with websites, including login details (usernames and passwords) and
credit card information. Naturally, when we share this information online, we expect the websites we use to keep it secure.
This means that website owners have a responsibility to ensure that their site visitors’ or customers’ data is kept safe. So, if you’re a website owner, you also share this duty!
One of the basic ways to make your site more safe and secure is by
migrating to HTTPS from HTTP. In this article, we’ll go over what makes HTTPS a better choice and how you can redirect your
WordPress website from HTTP to HTTPS.
What Is HTTPS and Why You Should Use It
HTTPS stands for
Hypertext Transport Protocol Secure. It’s an update on HTTP, which lacks the level of
security that comes with HTTPS. HTTPS uses SSL (Secure Socket Layer), i.e. TLS (Transport Layer Security) certificates to ensure a secure connection between the browser and the website.
So basically, any information exchanged between the user and the website gets
encrypted, so that it can’t be stolen and misused by hackers, even if they manage to intercept the traffic.
A good way to determine if the website you’re visiting runs on HTTPS is by checking the URL address line. Most of the time, you won’t directly see the prefix before the domain.

This is what you’ll see in the URL address line on our website
The first sign that a website uses HTTPS is the
padlock before the domain. The padlock is a sign of a secure connection, i.e. a HTTPS connection. To test if a site does indeed run on HTTPS, simply select the URL address, and then click at the end (after the
com). Once you click, the address will appear
with the type of hypertext protocol that it uses, like so:

An example of a website that runs on HTTPS
Once you click at the end of the URL address after selecting it, you’ll be able to see if a website runs on HTTPS.
Why You Need HTTPS For Your Website
As we already mentioned, HTTPS comes with significantly heightened security in comparison to HTTP. Here’s an overview of other perks you’d get when you redirect your WordPress website to HTTPS:
- Since August 2014, HTTPS has become a ranking factor in Google search results. This means that having your website run over HTTPS rather than HTTP will improve your SEO ranking!
- HTTPS is more secure since it requires a TLS handshake for authentication. So, your site visitors’ data will be safe! Plus, they’ll feel confident about using your website every time they see the padlock next to the URL address. This is likely to improve your conversions and sales.
- In fact, the new HTTP/2 protocol - which enhances site performance and increases page loading speed - requires HTTPS to run. So, if you want to optimize your site with the HTTP/2 protocol, you’ll definitely need to migrate to HTTPS.
- When someone visits a HTTPS website while coming from another HTTPS website, they have a more accurate referral data in Google Analytics. By contrast, if someone visits a HTTP website from a HTTPS website, most of this referral data will be lost in the process. So, to improve your referral data, migrate to HTTPS!
Now that you know the benefits of redirecting your WordPress website from HTTP to HTTPS, let’s take a look at how to do it.
How to Redirect Your WordPress Website from HTTP to HTTPS
There are a couple of easy steps in the process of redirecting your WordPress website from HTTP to HTTPS. Basically, the process is:
- Back-up your website.
- Activate your TLS certificate.
- Update the links to the pages on your WordPress.
- Edit your .htaccess/config file.
If you’re not feeling comfortable with handling any code, you can temporarily use a WordPress plugin, such as
Really Simple SSL. However, we don’t recommend this as a permanent solution. Although Really Simple SSL works great, a plugin is an additional layer that can cause bugs and problems in the future. Still, we’ll also go over how you can use a plugin as a temporary solution to redirect your WordPress website from HTTP to HTTPS.
Step 1: Back-Up Your Website
The first step before
any and
all website-wide changes is backing up your website. We’ll be making changes to the .htaccess file of your website, and changing other important settings that if done wrong, can cause some temporary chaos.
So, before doing anything, make sure to back-up your website!
Step 2: Activate Your TLS Certificate
First of all, does your host provide you with free SSL/TLS certificates? (
We do.) It’s super important to have a host that does. A TLS certificate is website security 101!
If your host does provide free TLS certificates, they most likely support
Let’s Encrypt. Let’s Encrypt is a
free, automated, and open certificate authority.
You can use Let’s Encrypt to get and implement your TLS certificate
Once you have this, you can access
Certbot, which will give you all the information you need on how to implement Let’s Encrypt on your website server based on which operating system and
web server you’re using.
Step 3: Update the Links on Your WordPress Website
Updating the Link to Your Admin Area
The first thing to do is
update the link to your WordPress admin dashboard.
To do this, you’ll need to connect to your server via
SFTP client.
Next, you’ll need to find the
wp-config.php file. Open it in any code or text editor (like Notepad). Add this line of code anywhere before the end (before it says
That’s all, stop editing!)
define('FORCE_SSL_ADMIN', true);
Then,
save the file, and reupload it back into the WordPress root folder.
Now, try to access your WordPress admin dashboard. You should be able to see the padlock - which means your connection is running over HTTPS and is secure!
Updating the Links to the Pages On Your Website
Your next step will be updating the URL address links to the various pages of your website.
To begin with,
update the site address. Go to
Settings > General.
Find your website address URL. If the link was
http://www.domain.com up to now, add that important
s and turn it into
https://www.domain.com, like so:

Change your website URL to begin with HTTPS rather than HTTP
Then, click on
Save Changes.
After you’ve updated this part, you should go over the rest of the links to the various pages, content, and media files (such as images) of your website. Make sure all the URLs run on HTTPS rather than HTTP.
Step 4: Edit Your Server File
The next step will be editing your
.htaccess or
NGINX config file so as to redirect HTTP to HTTPS using the
301 redirects.
If Your Server Runs NGINX
Which file in your server you need to edit will vary depending on whether your server runs
NGINX or
Apache.
How to redirect HTTPS on NGINX
If your server runs NGINX, you’ll need to connect to it via
SFTP client and add the following code to your
config file:
server {
listen 80;
server_name domain.com www.domain.com;
return 301 https://domain.com$request_uri;
}
If Your Server Runs Apache
If your server runs Apache, you can redirect your WordPress website to HTTPS by adding code to the
.htaccess file.
How to redirect your WordPress website to HTTPS on Apache
You can access the .htaccess file by connecting to your sever via SFTP client. If you can’t see the file, click on
show hidden files.
Once you’ve opened the file, copy the following code inside, then
save it:
RewriteEngine On
RewriteCond %{HTTPS} off
RewriteRule ^(.*)$ https://%{HTTP_HOST}%{REQUEST_URI}
Step 5: Test and Run!
After updating all the links on your WordPress website and changing the appropriate files in your WordPress root folder, a good way to check how well you’ve implemented TLS security is running your website through an
SSL Test like the one offered by Qualys.
This test will detect the TLS certificates on your website, and tell you if there’s anything you can improve about your security.
Next, it’s time to check if you’ve missed anything - like if you forgot to redirect a certain piece of content with a new URL address that includes HTTPS. Perhaps when you were updating the page links, you forgot to make sure that a certain image file runs on HTTPS?
In any case, there’s another awesome website test tool you can use -
SSL Check. SSL Check tests your entire website to see if there’s any piece of content that’s left insecure.
Once that’s done, your update site is ready to go live!
Alternative: Using a WordPress Plugin
If you don’t feel comfortable doing all this coding yourself, you can use a WordPress plugin such as
Really Simple SSL to redirect your WordPress website from HTTP to HTTPS.
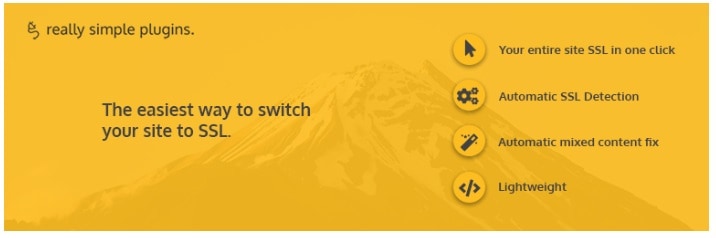
The Really Simple SSL plugin is an easy way to redirect HTTP to HTTPS
As we mentioned, this is more of a temporary solution. You can use this plugin, and contact your web host in the meantime. They can do the coding for you in the
.htaccess or
config file, while the plugin does most of the work of updating the various URL address links from your WordPress admin dashboard.
So, how can you use Really Simple SSL to redirect your site from HTTP to HTTPS? It’s, uh, actually
really simple. The only preliminary work you’ll have to do is get your SSL certificate - which, as we already mentioned, is easily available and free.
Just install and activate the plugin, and then click on
Go ahead, activate SSL. That’s it! With that simple command, this WordPress plugin will do the following bidding for you:
- Redirects incoming hTTPS requests from HTTP to HTTPS. As we mentioned, a plugin can even do the job inside your server files, if it has the right permissions.
- Updates your WordPress site URL and home URL to run on HTTPS.
- Automatically updates all insecure content URLs - changes every HTTP to an HTTPS address.
That’s pretty cool, right? Plus, the plugin is regularly kept up-to-date by the developer, so even as a temporary solution, it’s kept quite smooth and tidy!