Since Google’s speed update in July 2018, speed has become an important factor in website rankings on mobile searches. In fact, if you’re running your own website, you probably already know that having a fast-loading website is important both for SEO rankings and visitor satisfaction. With the plethora of visually stimulating information bombarding internet users, no one wants to stick around on a website that takes forever to load.
That’s why it’s important to use everything in your arsenal to have a fast-loading and smoothly performing website. One of the main ways to increase the loading time of your web pages is by decreasing their size. And the best way to do this is by enabling GZIP compression. By enabling GZIP compression to reduce the size of your web pages, you will:
- Increase your web page loading speed.
- Improve the rendering of your website.
- Reduce that data which the site visitor has to use when visiting your website.
It’s a win for all!

Enabling GZIP compression is one of the easiest ways to optimize your website
What Is GZIP Compression and Why Does It Matter?
GZIP is basically a file format and software app which can be used for the compression and decompression of data. GZIP was originally created as a free compression/decompression software for GNU by Jean-loup Gailly and Mark Adler way back in 1992!
Today, nearly 30 years later, GZIP is software supported by all browsers. Once you have GZIP enabled, browsers read this in your pages’ headers and automatically compress them. But what does this mean?
The GZIP file format compresses a web page’s HTML, JavaScript files, and stylesheets (CSS), which significantly reduces the weight of the page. This allows it to load more quickly and to use up less of the client’s data. In fact, GZIP compression has allowed up to 70% decrease in the weight of some pages! Can you imagine how much this increases page loading speed?
To give you an idea of what makes GZIP compression so important, let’s look at some research done by the SEO guru, Neil Patel.
According to Patel:
- About 47% of website visitors expect a web page to load in 2 seconds or less.
- About 40% of visitors say that they will abandon a web page if it takes more than 3 seconds to load.
- Even a single second of delay in the page’s response can result in a 7% conversion loss! This means that a website that loads one second more slowly can cost you a 7% reduction in sales!
So there you have it - even the smallest decrease in loading speed can end up costing you site visitors and sales.
Alright, so that’s site visitors - what about browsers?
Well, we already mentioned that the Google speed update takes page loading speed as a factor in mobile SERPs. What this means is that Google crawlers prefer faster loading websites and bring them closer to the front page of the results!
There are a lot of tools you can use to improve your SEO rankings, but honestly, you should by no means miss out on enabling GZIP - it’s too simple and profitable to skip out on!
Do You Need GZIP Compression, or Is It Already Enabled?
GZIP compression may already be enabled on your WordPress website by your web host or one of your website contributors.
So how can you tell if you need to enable GZIP compression, or if it’s already enabled?
Well first of all, running your website through a speed testing tool like GTmetrix or Google PageSpeed Insights can give you a good idea of what you’re doing right as well as what you’re doing wrong. We recommend using one of these tools to check what areas you can work on to improve your website’s loading speed and performance.
For instance, you may learn that while you’re doing a good job in optimizing your images, you are falling short in other web optimization methods - like enabling GZIP compression. If your test results in GTmetrix or Google PageSpeed Insights have a line that says something like “enable GZIP compression” or “enable page compression,” it means that you probably don’t have GZIP compression enabled and should do it!
How to Check if GZIP Compression is Enabled
If you don’t want to run your page through a speed test tool and then have to interpret the results, there are two easy ways to directly check if GZIP is enabled on your WordPress website.
1. Use An Online Testing Tool
An easy way to simply check if GZIP compression is enabled on your website is running it through a specialized online tool, like the Base64 Guru GZIP compression test. All you need to do is enter your website’s domain, hit enter, and see what it has to say!
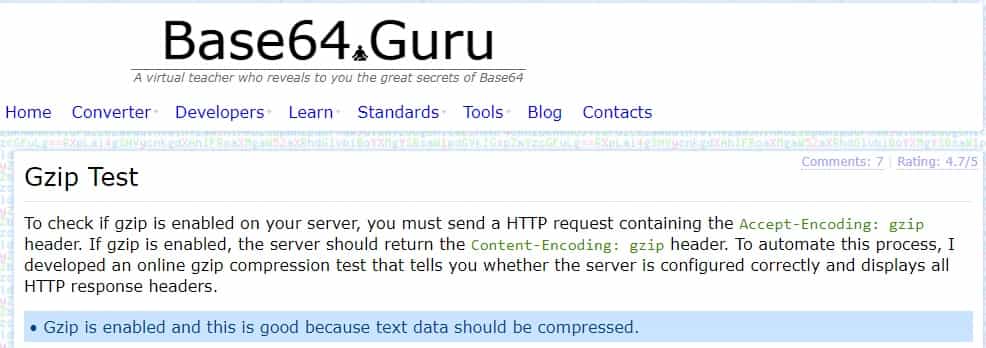
Check if GZIP compression is enabled on your web page using an online test like Base64 Guru
As you can see, after we ran our website through Base64 Guru, we got the result at the bottom of the image saying Gzip is enabled and this is good because text data should be compressed.
If you run your website through a specialized tool like Base64 Guru, or one of the general page speed tests like GTmetrix or Google PageSpeed Insights, and you learn that GZIP compression isn’t enabled, you should work on changing that right away!
2. Check Using Chrome Developer Tools
Another simple way to check if GZIP is enabled on your website is by opening your website, accessing Chrome’s Developer Tools, and then checking if GZIP compression is present in the header.
Here’s how to do that.
- Open your website.
- Go to Customize and control Google Chrome > More tools > Developer tools. The developer tools window will appear on your website.
- Click on Network from the options in the top tab. Then, click on the link that appears in the box.
- Open the Headers tab. Two windows will appear one under the other. The top one will say General, the bottom one will say Response Headers. That’s the one we’re looking for!
- In the Response Headers window there is a line that says content-encoding. If you have GZIP enabled, gzip will appear next to this line. Here’s an example of what this will look like if GZIP is enabled on your website:
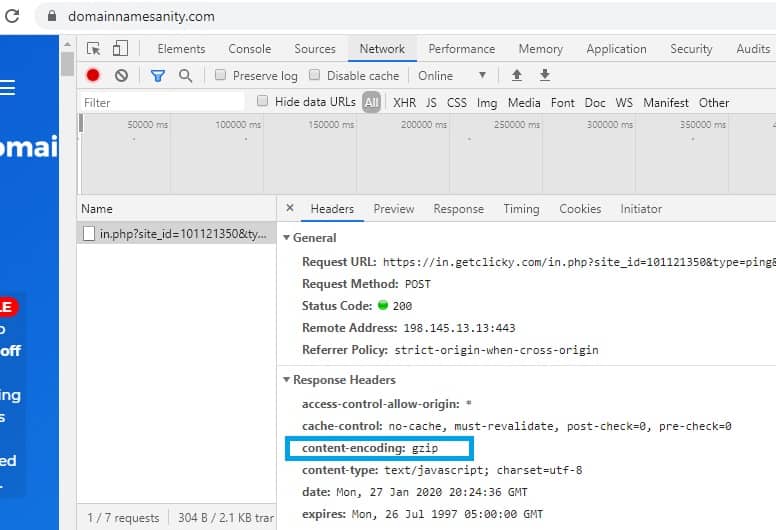
Check if GZIP compression is enabled from Chrome DevTools
As you can see, we used Chrome DevTools to check if GZIP is enabled on our website.
Once you’ve used one of these methods, you’ll know if GZIP is enabled on your WordPress website.
If you found out that this is already taken care of, awesome! You’re one step ahead and now you can focus on other ways to improve your website’s performance - like by leveraging browser caching or optimizing images for improved site performance.
If, on the other hand, GZIP is nowhere to be found, it’s time to change this before moving onto those other website-enhancing techniques.
So without further ado, let’s look at how you can enable GZIP compression on your WordPress website!
How to Enable GZIP Compression On Your WordPress Website
There are a few simple ways to enable GZIP compression on your web server. Depending on what you feel comfortable doing, you can enable GZIP compression either by using a WordPress plugin, or by modifying the files on your web server.
1. Use a WordPress Plugin
Wordpress plugins such as WP Rocket or W3 Total Cache include options to enable GZIP compression on your website. These plugins enable GZIP compression by adding GZIP compression rules to your .htaccess file (you can also do this yourself - and we’ll cover that in the next step).
Still, for these plugins to modify your .htaccess file, they’ll need to have permission to access it. If the plugins don’t have permission, you’ll either need to ask your host to provide it or do the work in the .htaccess file yourself!
Still, let’s look at an example of how you can enable GZIP compression using W3 Total Cache. First, you’ll need to add the plugin to your WordPress plugins library and activate it.
Once activated, there will be a Performance tab above your admin dashboard. When you hover the mouse above it, a drop-down menu will appear. Click on General Settings from the drop-down menu.
Scroll down to Browser Cache from the ensuing window.
Check the box that says Enable HTTP compression, like so:
To enable GZIP compression using W3 Total Cache, enable HTTP compression under the Browser Cache section
Then, click on Save all settings.
2. Update Your .htaccess File In Apache
If your web host uses Apache - and most shared hosts do - you can enable GZIP compression by adding some code to your .htaccess file. To do this, you’ll need to connect to your host via SFTP client. If you haven’t logged into your server using SFTP client before, you can find your username and password in an email that your host sent you way back when you signed on. If you can’t find that email, ask your host for the information.
So, to update your .htaccess file, connect to your server via FTP client. Then, access your WordPress root folder, and locate the .htaccess file. If you can’t see your .htaccess file, click on show hidden files.
Copy and paste the following code into your .htaccess file:
<IfModule mod_deflate.c>
# Compress HTML, CSS, JavaScript, Text, XML and fonts
AddOutputFilterByType DEFLATE application/javascript
AddOutputFilterByType DEFLATE application/rss+xml
AddOutputFilterByType DEFLATE application/vnd.ms-fontobject
AddOutputFilterByType DEFLATE application/x-font
AddOutputFilterByType DEFLATE application/x-font-opentype
AddOutputFilterByType DEFLATE application/x-font-otf
AddOutputFilterByType DEFLATE application/x-font-truetype
AddOutputFilterByType DEFLATE application/x-font-ttf
AddOutputFilterByType DEFLATE application/x-javascript
AddOutputFilterByType DEFLATE application/xhtml+xml
AddOutputFilterByType DEFLATE application/xml
AddOutputFilterByType DEFLATE font/opentype
AddOutputFilterByType DEFLATE font/otf
AddOutputFilterByType DEFLATE font/ttf
AddOutputFilterByType DEFLATE image/svg+xml
AddOutputFilterByType DEFLATE image/x-icon
AddOutputFilterByType DEFLATE text/css
AddOutputFilterByType DEFLATE text/html
AddOutputFilterByType DEFLATE text/javascript
AddOutputFilterByType DEFLATE text/plain
AddOutputFilterByType DEFLATE text/xml
# Remove browser bugs (only needed for really old browsers)
BrowserMatch ^Mozilla/4 gzip-only-text/html
BrowserMatch ^Mozilla/4.0 no-gzip
BrowserMatch bMSIE !no-gzip !gzip-only-text/html
Header append Vary User-Agent
</IfModule>
3. Update Your nginx.conf File in NGINX
If your server is running on NGINX, the procedure is slightly different.
Do enable GZIP compression on NGINX, find the nginx.conf file and copy the following code inside it:
gzip on;
gzip_disable "MSIE .(?!.*SV1)";
gzip_vary on;
gzip_types text/plain text/css text/javascript image/svg+xml image/x-icon application/javascript application/x-javascript;
And you’re done!