
Seeing an error code when trying to open a website can get quite frustrating. Instead of the website displaying in your browser, you get an annoying error message. When you see an HTTP status code indicating a loading error, your first instinct may be to sigh in resignation, or curse in indignation.
But before you do either, you should know that there are usually easy fixes for these HTTP error codes!
Most commonly, the HTTP status codes in the 400’s family indicate client-side issues. This means that they can usually be resolved on your end.
The same goes for the HTTP 400 Bad Request error message. In this article, we’ll look at what it means, what causes it, and how you can fix it!
What Does the 400 Bad Request Error Mean?
The 400 Bad Request error is an HTTP status code indicating that the client (you) sent a request to the website server which was either incorrect or corrupted. Therefore, the server couldn’t understand the request, which could be something as simple as loading a page. So the root of the 400 Bad Request error is somewhere in the submitted request, i.e. a client-side issue.
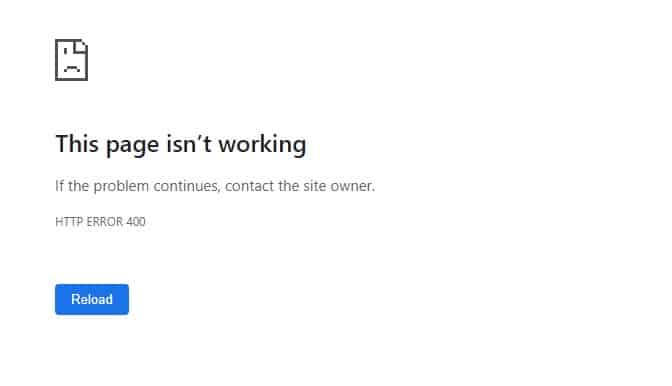
The HTTP 400 error in Google Chrome
While other HTTP status codes in the 400’s may be more specific about what’s causing the error, servers interpret the HTTP 400 error as a generic client-side error. When a server can’t categorize an issue more specifically, but determines the error to be on the client’s side, you get the 400 Bad Request status code.
This can happen on a third-party website or on your own website. The possible fixes may vary based on which scenario you’re faced with.
Don’t worry, we’ll outline possible fixes for both cases! But first, let’s go over some specific culprits that may be causing the 400 Bad Request error in your browser.
What Causes a 400 Bad Request Error?
There are a number of causes for the 400 Bad Request error. Here are some of the most common roots of this issue:
1. Mistyped URL
As usual, the simplest cause is also the most common one. The 400 Bad Request error is often the result of a mistyped URL address. This can be bad syntax or illegal characters in the URL address.
For instance, and additional % (percent) sign in the URL address, like %%20 instead of %20 can easily be causing a 400 Bad Request error.
Illegal (invalid) and unwise characters in the URL address can also be causing a 400 Bad Request error code. For instance, using a character such as [ and ] are illegal in most cases. (In this case, [ and ] are reserved characters that are only legal as parts of an IPv6 literal host in a URL.)
2. Corrupted Files in the Browser Cache and Cookies
Another common cause of the 400 Bad Request error are corrupt or expired files in the browser cache and cookies.
Corrupt cache can give you trouble accessing websites, while expired cookies can even prevent you from accessing your WordPress admin dashboard.
3. Out-of-Sync Local DNS Cache
In addition to the browser cache, your local PC cache may also be causing the 400 Bad Request error. This can happen if your local DNS cache is out of sync with your PC’s registered DNS.
4. Trying to Upload Too Large a File
The 400 Bad Request error may occur on your website if you’re trying to upload a file that’s too large in size. While there are ways to increase the maximum upload file size for your WordPress website, the 400 Bad Request error specifically happens when the maximum file size limit is set by the server.
5. Temporary Server Glitch
Although 400 Bad Request is usually a client-side error, it can also be due to a temporary glitch on the server. Additionally, server maintenance or other short-term issues may be making the website inaccessible.
The best way to check if the 400 Bad Request error is caused by the server is to try opening the website in incognito, in another browser, or on another device. If the same error code appears in every case, then all you can do is wait and try loading the website at a later time. Alternately, you can contact the website owners and let them know about the issue!
Without further ado, let’s look at how you can fix the 400 Bad Request error in each of these scenarios!
How to Fix the 400 Bad Request Error
You’ll find that the fixes for the 400 Bad Request error are quite simple and easy to do. Some of these solutions are applicable for third-party websites, some for your own website, and most are applicable for both!
1. Check for a Mistyped URL
As you may remember, a mistyped URL address is one of the most common causes of a 400 Bad Request error. So the first and easiest thing to do is to double-check the URL.
Have you used any unwise or illegal characters? Is the domain name typed in correctly? Is there a forward slash before the specific page you’re trying to access on the website? (For instance, if you’re trying to access the DomainNameSanity blog, you’ll need the / (forward slash) after com before blog, ie. https://www.domainnamesanity.com/blog/)
If you’re dealing with an especially lengthy URL, try using an online URL decoder. In its own words, it’s quite useful in turning “encoded JavaScript URLs from complete gibberish into readable gibberish.”
Once you’ve ensured that you’ve input the correct URL, try loading the website again. Did it work?
If not, let’s keep troubleshooting.
2. Clear Your Browser Cache
Corrupt files in your browser cache may be causing the 400 Bad Request error.
In general, browser caches are quite useful, as they help load the page faster on return visits. Namely, browsers – like Chrome – store information from your previous internet activity in their cache. This includes cookies, login information, browsing history, and other data you may enter when interacting with a website. So the next time you try to access the same website, the process goes more smoothly, as the cache feeds your browser information to navigate more quickly.
However, corrupt files in your browser cache may be causing the 400 Bad Request error. Additionally, outdated information in the browser cache may be incompatible with the latest version of the website.
In this step, we’ll go over how you can clear your browser cache to fix the 400 Bad Request error. Before you go flushing your browser cache, however, there’s an easy way to check if it’s the browser cache or cookies that are causing the issue. You can check this by opening the website in Incognito Mode.
As Incognito Mode doesn’t save most of the usual data that gets stored in the cache (browser history, cookies, login data), it can give you an idea of whether the website would load if you cleared the browser cache.
Basically, if you can access the website in Incognito Mode, the next step will be clearing your browser cache in regular mode.
To open Chrome in Incognito, click on Customize and control Google Chrome (the little circular button with three dots in the top-right corner of the screen, just below the X), and select New Incognito Window.
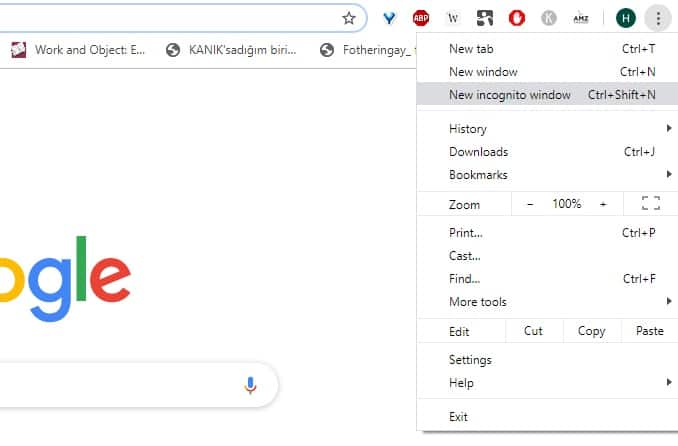
How to open an incognito window in Chrome
You can also press Shift + Ctrl + N at the same time to open Chrome in Incognito.
Once in Incognito Mode, try opening the website again.
If the website loaded properly without the 400 Bad Request error in Incognito, it’s time to clear the browser cache! To do this:
- Go to Customize and control Google Chrome > More Tools > Clear browsing data. Alternately, hit Ctrl+Shift+Delete.
![]()
Click on Clear browsing data to clear your browser cache
- Check the box next to Cached images and files to flush the browser cache.
![]()
How to clear browser cache in Chrome
- Once you’ve checked the appropriate box, click on Clear data.
- Relaunch your browser. Close Chrome and open it again for the changes to take place!
- Try loading the website again. Hopefully, clearing your browser cache will do the trick, and you’ll be able to access the website without the 400 Bad Request error!
3. Clear Your Browser Cookies
Let’s say you did manage to open the website in Incognito, and then you did flush the browser cache, but the website still won’t load properly in regular mode.
If that’s the case, it’s time to clear your browser cookies! To do this:
- Go to Customize and control Google Chrome > More Tools > Clear browsing data. Alternately, hit Ctrl+Shift+Delete.
- Check the box next to Cookies and other site data to clear cookies from your browser.
- Once you’ve checked the appropriate box, click on Clear data.
![]()
Clearing browser cookies can help resolve the HTTP 400 error
- Relaunch your browser. Again, to make sure the changes take place, you’ll need to reset your browser.
- Try loading the website again. Hopefully, the website will now load properly, and you’ll have resolved the 400 Bad Request error!
4. Dealing with a File that Exceeds the Maximum Upload File Size
If the 400 Bad Request error is appearing on your WordPress website when you’re trying to upload a large media file (image, video, or audio), the file size is probably the cause of the issue.
Namely, trying to upload a media file which exceeds the maximum upload file size set by your web server can cause the 400 Bad Request error.
There are two ways to fix this: either by reducing the size of the file, or by increasing the maximum upload file size on your server.
Before you do either, an easy way to check if this is indeed causing the issue is trying to upload a smaller media file. If this worked, and your website loaded without the 400 Bad Request error, you’ll need to do something about that file size!
Method One: Reduce the Size of the Media File
One thing you can do is reducing the size of the media file. There are a number of online tools and WordPress plugins that work to compress the size of images, videos, and audio files.
Let’s look at images as an example. To begin with, there are a number of free online compression tools that can be used to compress an image. This allows you to significantly reduce the size of an image, while maintaining most of its visible quality. Some such online tools are Toolur, JPEG-Optimizer, TinyJPG, and Kraken.

TinyJPG is one of the websites you can use to compress images
You can check out these websites and see what features and file sizes they offer in free and premium versions.
Another way in which you can reduce the image file sizes for your website are WordPress image compression plugins. Most of these plugins come in both free and premium versions, are very easy to use, and can help you optimize images for improved website performance.
Here are some of the most popular WordPress plugins you can use for image compression and optimization:
Lastly, you can use desktop programs like PhotoShop and Gimp for more complex photo manipulation, including the rescaling of images, or programs like FastStone for simpler purposes – like reducing the size of an image.
Method Two: Increase the Maximum Upload File Size On Your Server
If reducing a file size doesn’t work for you, you’ll need to increase the maximum upload file size for your WordPress website via your server.
There are a number of methods to increase the maximum upload file size on your server via FTP client. You can do this by tweaking some code in one of the WordPress root files, such as php.ini, .user.ini, .htaccess, wp-config.php and so on.
A sure-fire way to increase the maximum upload file size on your server is to contact your web hosting provider. They can do the coding for you! It especially makes sense to do this if the web host has limited your access to the server data.
Keep in mind that cheaper hosting options, such as shared hosts, usually come with lower memory and lower maximum upload file size limits. So in the end, you may simply need to purchase a more expensive hosting plan that comes with more storage space.
5. Flush Your DNS Cache
Your local DNS cache, which is stored on your PC, is another possible cause of the 400 Bad Request error. Similarly to your browser cache, outdated data in your DNS cache can lead to loading trouble!
Plus, incompatibilities between your PC’s registered DNS information and the files stored in your DNS cache can also be causing the 400 Bad Request error.
Don’t worry, though – clearing your local DNS cache is quite easy.
To flush your DNS cache:
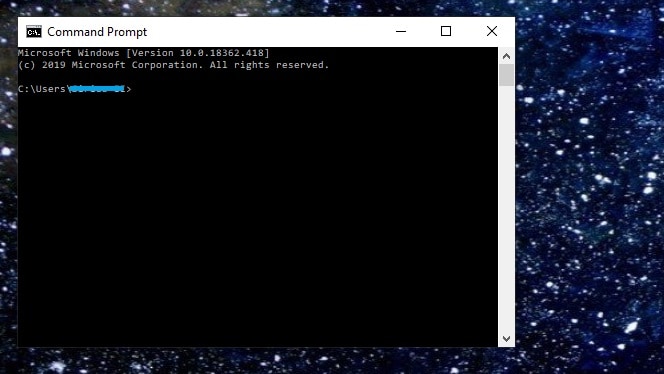
- Open Command Prompt. To do this, type CMD into the search bar at the bottom of your screen (if you’re using Windows 10) or hit the Windows key and then type in CMD.

This is your Command Prompt
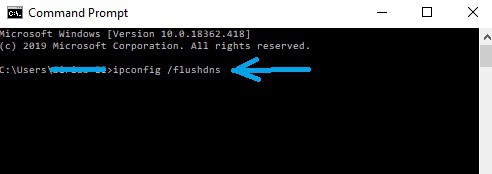
- Clear your DNS cache. To flush the DNS cache from your computer, type:
ipconfig /flushdnsafter your PC’s username (the part covered in blue), and then hit Enter.

How to flush your DNS cache using Command Prompt
If you’ve done this correctly, the following two lines will appear in the Command Prompt:
Windows IP Configuration
Successfully flushed the DNS Resolver Cache.
- Restart your computer. To make sure the changes have taken place, you’ll need to restart your PC after flushing the DNS cache.
- Try opening the website again. Hopefully, flushing your DNS cache worked, and now you can open the website without the HTTP 400 error message!
6. Disable Your Chrome Extensions
Chrome extensions can be very useful. We all have ad-blockers, SEO builders, and a variety of our own preferred, niche extensions that make our work online easier to navigate.
However, most Chrome extensions are created by independent web developers, and aren’t always the subjects of regular updates. If a Chrome extension hasn’t been updated by its developer in a while, it may begin to cause issues with your browser, such as the 400 Bad Request error.
To find out if the error is caused by a misconfigured Chrome extension, try disabling your Chrome extensions temporarily.
Keep in mind that just as we did with browser cache and cookies, you can check if a possible cause of the issue are Chrome extensions by opening the website in Incognito Mode. Unless specified otherwise, most extensions are disabled in Chrome. So if your website opens in incognito and the issue is neither the cache nor the cookies, there’s a good chance that the 400 Bad Request error is caused by outdated Chrome extensions!
To disable your Chrome extensions:
- Go to Customize and control Google Chrome > More Tools > Extensions.
- Review your extensions. We recommend that you remove the extensions which you no longer use.
- Before disabling your extensions, update them > relaunch Chrome > try loading the website again. In some cases, this may do the trick. If it didn’t work, let’s keep going.
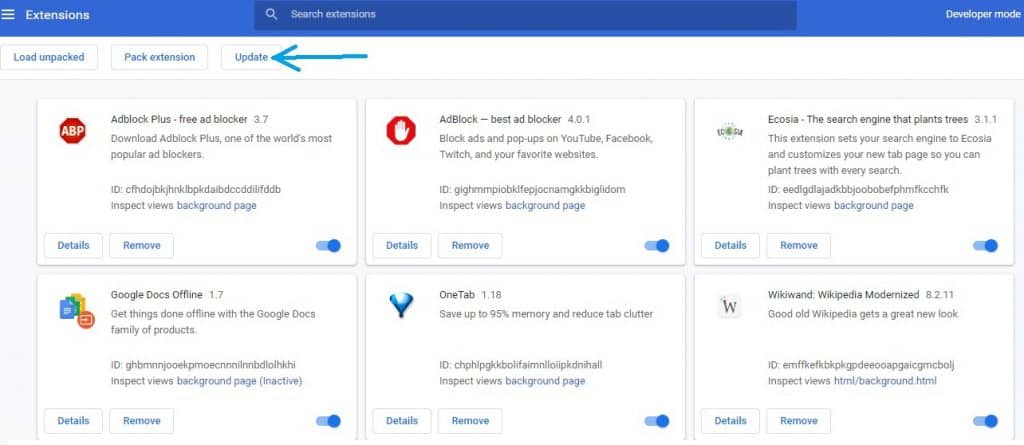
Updating your Chrome extensions manually can resolve the 400 Bad Request Error
- Disable all Chrome extensions. Move the little blue point to the left end of the line in the bottom-right corner of each extension box.
- Once you’ve disabled all extensions, relaunch your browser and try loading the website again. If the website loads properly, without the 400 Bad Request error, one of your extensions was causing the problem. You’ll need to find out which one it is and get rid of it.
- Re-activate your extensions one at a time by dragging the blue point to the other end. Refresh the website after each activation. When the 400 Bad Request error appears again, you’ll know that the last extension which you activated is causing the problem.
- Remove that extension. You can also choose to contact the developer and let them know about the issue.
7. Contact the Website Owners
As we said, in most cases, the 400 Bad Request error is a client-side issue. So up to this point, we’ve gone over what you can do to fix the error on your end.
However, in some cases, the 400 Bad Request error is caused by temporary issues, glitches, or maintenance on the website server.
A good way to check if the issue is caused by the website server is to try opening the website in another browser or from another device. If the problem persists, it means that it’s not local, and it’s most likely caused by the server.
The first thing you can do is wait a bit, and try accessing the website a little later. If the 400 Bad Request error is still around, we recommend that you contact the website owners. They may not be aware of the problematic HTTP status code – the 400 Bad Request error – on their website.
By letting the website owners know about the problem, you’re:
- Helping yourself – hopefully, the website owners will work out the issue with the server and you’ll be able to access the site soon enough!
- Helping the website owners – too much downtime can tank a website’s SEO rankings, so in contacting the website owners, you’ll help them maintain their SEO!
The same goes if the case isn’t a third-party website, but your own website. If you’ve confirmed that none of the above causes were behind the 400 Bad Request error on your website, contact your web host as soon as possible so that they can fix whatever’s going on with the server.

Why Are My Emails Going to Spam?
There is no experience more frustrating than having your emails end up in the spam folder of your recipients rather than their inboxes. If you’ve found that your emails are going to spam instead of your subscribers’ inboxes, keep reading to find out why.

How to Become Tech Savvy
In a world where technology shapes our society and everyday life, knowing how to operate a computer and other common tech gadgets becomes a survival skill.

What two protocols are used to deliver mail messages?
Emailing today is such an easy task. Compose, hit send, and your message travels across oceans and borders to reach its recipient. It is such an easy task that people’s attention starts to drown in their full inboxes, which are also littered by spammers, phishers and other members of the not-so-nice population of netizens.
Simple and impressive article. Not only, but you also address the causes, but also give the solution to a problem. After the Google recent announcement, for the 2021 Google updates, the user experience is getting more important. Having the 400 Bad Request Error will definitely affect the user experience, which will lead to a decrease in your SEO ranking. Thank you for sharing.