How much attention do you pay to the images you upload on your website?
Do you check the quality and size of the images you use?
Are you aware that image optimization can make or break the popularity and appeal of your website?
OK, we don’t want to overwhelm you! The reason we ask these questions is because a lot of the time, people spend time and effort to make their websites impeccable, but forget the importance of image optimization.
You may find yourself investing in content, design, and image quality, but dropping the ball when it comes to image optimization.
The reason why people forget about image optimization is that they think it’s a hassle. They look at it as yet another bothersome thing to do on an endless to-do list. However, image optimization is actually one of the easiest ways to improve the performance of your website. It can make or break the SEO placement of your webpage and it has a tremendous impact on user experience.
But don’t worry! We prepared a useful guide on how to optimize the images on your website for improved performance. We’ll take you through the process of image optimization step by step, so no question is left unanswered.
Without further ado, let’s look at what image optimization is and how you can optimize images for web and performance!

An optimized high-resolution image
What Does It Mean to Optimize Images?
Optimizing images means formatting them so that they are small enough to load fast and keep your page running smoothly. This is how you make Google love you, and increase the chances of bringing your website to the first page of search results. Plus, large images slow down the loading of your page. This is going to frustrate your visitors, and you really don’t want that.
The second way to optimize the popularity of your image in a Google search is to give it a relevant name. If your picture of a puppy is named img1.jpeg, how is it supposed to pop up in a Google search when someone Googles “puppy?”
Optimizing images also means maintaining a decent quality even after reducing their size. Your visitors will not be happy looking at a grainy, pixelated image. It makes your website look cheap and unprofessional.
In the end, what optimizing images means is reaching a balance between size and quality that will have your page loading quickly and your image still looking pretty good. This will bring your website in the first pages of the search results, and keep your site visitors coming back for more.
Bottom Line: Image optimization is the process of formatting images to achieve a small enough size and a high enough quality. It allows your page to load quickly and your images to look good!
Why Should You Optimize Images For Web?
Let’s go over the technical and practical reasons for optimizing images for web and performance.
Images Come Only Second to Video in How Much Web Page Weight They Occupy
According to HTTP Archive’s statistics, updated last on October 1, 2019, images comprise over 20% of the weight of a web page. Let’s look at some average values to make this clearer.
The total median weight of a page on a desktop is about 1950 KB. Images alone (if we don’t consider video) take up about 982 KB of the total weight. This is about 50% of the total weight of the page!
The numbers are similar for the weight of a median mobile page. The total weight of the page is about 1752 KB, and images take up 891 KB of that. Again, it’s half of the page’s total weight!
How Does Image Size Affect Your Ranking?
In July 2018, Google launched their so-called Speed Update, which takes the loading speed of a page on mobile into consideration.
In other words, the Google mobile search algorithm is now affected by how quickly your page loads. The slower it loads, the lower down in the search results it will be. The faster it loads, the more chances it will come out on top.
There are two main things that slow down the loading speed of a page:
- Poor JavaScript performance. This happens when either the codes are too long, or JavaScript and CSS files aren’t combined into single entities on the web page. You can work this out by using JavaScript optimization. Alternatively, CMS platforms like WordPress or Magento will do JavaScript optimization for you.
- Large, high-quality images. This is the problem that concerns us right now. If your image is too large or high-quality, it will cause your page to load slowly, frustrating your visitors and losing you Google interest!
But let’s see how this translates into practical terms.
Why Is Image Optimization Important For Website Visitors?
Consider what’s popular on social media, for instance. What sort of content is most often viewed on social media? Images.
Images are the first thing that a person sees. They’re the thing that can make visitors more or less interested in the content that follows. In today’s fast-paced world, images drive audience interest. Whether it’s the promotion of products, businesses, institutions, or individuals, images are the first thing that will catch a person’s attention.
In fact, we are surrounded by images all the time. Even in our daily lives – outside the computer screens – we are surrounded by images on the TV’s in our homes, and large ads and posters on the streets.
As for the internet, well… we see images everywhere. For instance, on:
- Blogs
- Social Media
- Product Pages
- Businesses
- Magazines
- Entertainment Websites
- Ads on websites
- Your Google Homepage
And the list goes on.
Case Study: Image Optimization In Product Placement
To better showcase the importance of optimizing an image, let’s look at a study by BigCommerce and Square on the impact of images on online shopping.
After extensive study and surveys of American online shoppers, the research revealed that images are the most crucial aspect of the online shopping experience.
The image is the first thing that a customer will see about a product. The first seconds of viewing are crucial! In these first seconds, the customer often decides whether they like the product or not. Whether that is the product they need.
In other words, before anyone looks at the product description, they look at the picture of the product. If the picture does not do your product justice and make it look good, a potential customer will move on without a second thought. Similarly, if the image takes too long to load, your potential customer will lose interest.
So, once again, two things are important here: image quality and fast loading speed. You can strike a balance between the two through image optimization.
Online shopping is another instance in which we go back to the Google Speed Update. As the Speed Update is aimed at mobile search algorithms, and online shopping is increasingly done via mobile, having optimized images can really help boost your sales.
If your image is of poor quality, the visitor will swipe past the product. If the image is too high-quality (large), it will load too slow and frustrate your potential customer. You don’t want visitors bouncing right off your page! And as we’ve mentioned, slow loading will also frustrate the search engine, e.g. Google. This further decreases the exposure of your product.
Bottom Line: Image optimization will bring your website to the top of the SERPs and will have your visitors coming back for more.
What Are the Benefits of Image Optimization for Web and Performance?
Before we delve into how you can optimize images for web and performance, let’s go over some of the benefits of image optimization.
Better Loading Speed
The smaller weight of formatted images improves the loading speed of your web page. This will make both search engines and visitors like your site better!
Plus, optimized images use less bandwidth. This means that internet networks running on slower internet won’t take forever to load your page, either. At the same time, your page won’t eat up much of the visitor’s limited mobile data.
Better Appeal
An optimized image will kick your page higher up in the SERPs, and will look appealing to your target audience.
Better SEO
Optimizing the image alone already improves SEO somewhat. This is because of the faster loading speed of a compressed image, for one. For another, as we already mentioned, giving the image a relevant title (name) will increase its exposure in a Google search.
Still, you should combine image optimization with a decent SEO plugin. There’s a number of great SEO plugin options for various content management systems (CMS’s). If you’re using WordPress, for instance, you can download the free or premium version of Yoast, a popular SEO plugin beloved amongst users.
Faster Backup
When your website is lighter on KB, it’s going to take much less time to create backups.
Uses Less Storage Space
Every CMS has limited disk space on its server for each user. No matter how much disk space or bandwidth you’re allowed to use, a website can grow faster than you’d think. It won’t be long before you reach a 20 GB limit, for instance, and wonder how you can scale way down.
Well, image optimization is another great way to use less storage space on your server.
Bottom Line: Image optimization improves the loading speed, appeal, and SEO ranking of your website. It also facilitates creating faster backups and uses less storage space on your server.
How to Optimize Images for Web and Performance: Overview
Striking the right balance between image size and quality
Let’s look at an example of the good, the too good, and the ugly images that you can wind up with. The “good” here refers to an optimized image, the “too good” to an original, high-resolution image, and the “ugly” to an over-compressed, pixelated image.
Here’s the original:
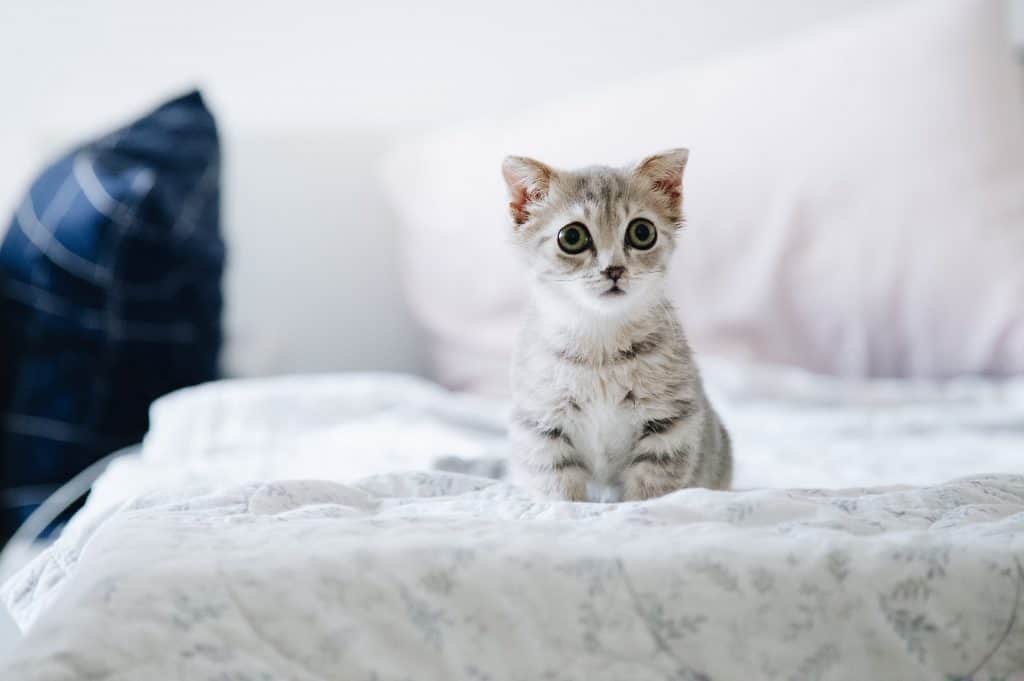
The “too good:” example of the original, high-quality photo, 365 KB
This is the original photograph, with low compression, and has a size of 365 KB.
That’s quite a bit, considering that the median weight of a web page is below 2000 KB. So you would definitely need to compress the photo somewhat before uploading it to your page.
Why does this adorable kitten look frightened, you may wonder. It’s because she’s afraid of what might happen if you over-compress the image. Well, this is what may happen.
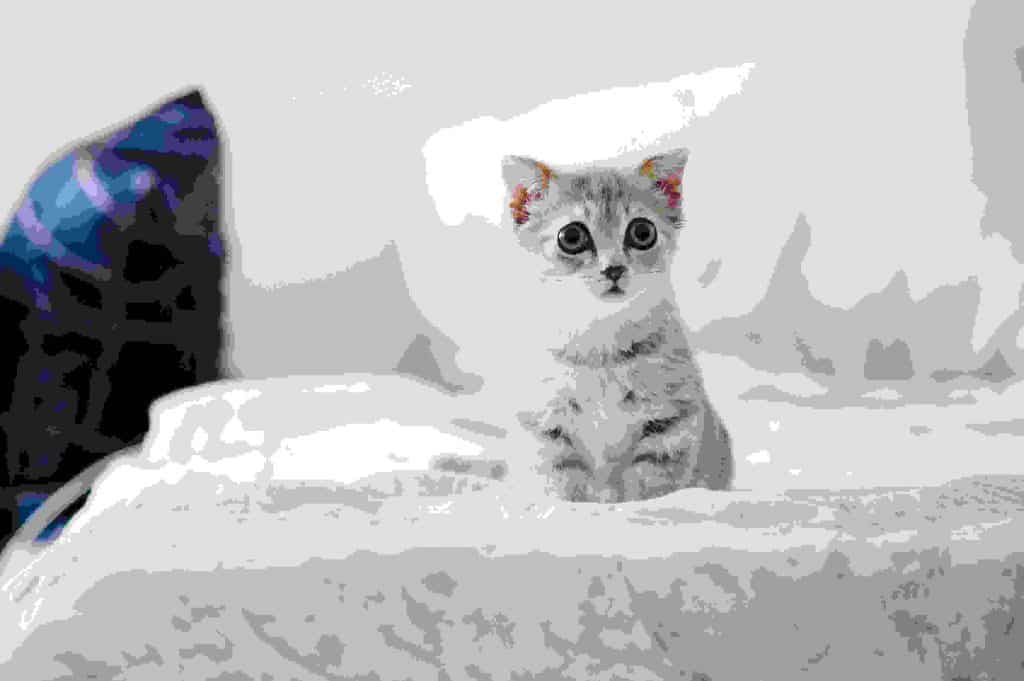
The “ugly:” example of an over-compressed, low-quality photo, 50 KB
Now we’ve compressed the photo, but it looks awful. (Unless you think it looks artistic – but that’s not at all what we were going for.)
It’s grainy, pixelated, and a lot of the color and content are gone! The size of this image is 50 KB, which is too little to maintain any of the original quality of the photo.
So let’s give it another go, and try to strike the perfect balance of image size and quality.
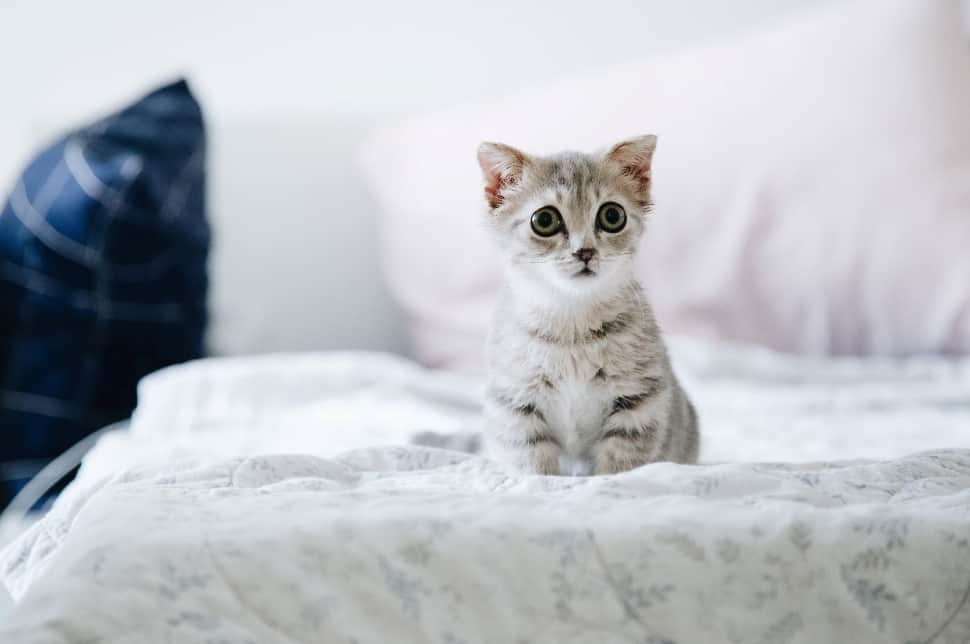
The “good:” Example of a good quality optimized image, 100 KB
Voila! This is a medium-compression image that still maintains great quality. It doesn’t look very different from the original, but it weighs only 100 KB, almost a fourth of the original size.
The ideal size of images on your website should be between 80-150 KB, but we’ll get into the details of that in a bit. This is an example of a good size (compression) to quality ratio. The kitten still looks frightened, but at least now you can properly see the pretty colors of her fur.
What is a good file size for web images?
The best file size for web images depends on the file type, but in general, an image shouldn’t surpass 150 KB, at most. If you’re working with a “full page” or a high-resolution image, 100 – 150 KB is a good range to aim at when compressing.
As you witnessed from the example above, compressing a high-resolution image to 25-50% of its original size doesn’t make any significant changes in quality.
Can you really tell the difference between the 365 KB and 100 KB photo versions of the kitten? It’s rarely worth slowing the load speed on your page and increasing its weight with a 2 MB image file (which again, should be the full weight of your page!).
Plus, compressing a 2 – 3 MB image to the recommended range of 80-150 KB won’t affect the visible quality of the image.
That’s high-resolution images. What about small or simple images that either take up a tiny part of the page or don’t contain much content? In that case, compressing an image to under 100 KB is recommended.
In fact, when it comes to small images like banners, compression to 20 – 30 KB is ideal. While high-resolution images are usually in JPEG format, simpler images (like graphic images or text) are in PNG format.
This brings us to the different types of image formats, and which formats are most suitable for different purposes. But before we get into that, let’s go over the two types of image compression.
The difference between lossy and lossless image optimization
You can optimize images using lossy or lossless compression.
Lossy compression eliminates some of the data of the original image, but it needn’t be noticeable.
The example we gave you of image optimization (the cute kitten) was done with lossy optimization. The reduced size didn’t visibly affect the quality of the photo! If maintaining the initial quality of the data is not a priority for you, lossy compression is a good choice.
The great thing about lossy compression is that it significantly reduces the size of the original image, which is what you’re aiming for with image optimization anyway.
However, as lossy compression degrades the quality of the image, be mindful of how much you reduce it. As we’ve mentioned, you can reduce an image to 20-50% of the original. But reducing it too much can result in a grainy, pixelated photo that won’t look good.
Lossless compression compresses the original data, without eliminating it. With lossless compression, you’ll be able to reconstruct data in its original form. Lossless compression is basically used to enhance the performance of a file’s, or in this case, an image’s compression ratio. However, before rendering, you’ll have to uncompress the image.
We recommend that you try both methods and see which one you prefer. In the end, you may find that lossy is better for one type of image, and lossless better for another. Let’s circle back to image formats.
What is the best format to save images for web?
There are several different types of image formats you can choose from depending on the context and aim of your image.
JPG, or JPEG
JPG, or JPEG is the most widely used image format on the web. The great thing about JPG’s is that they can be compressed to a small size without losing much of the visible quality of the image. The example we gave is a JPG image.
JPG’s are compressed with lossy compression, so a good deal of the original’s data is eliminated in the process. You may lose some nuances if the original is a very high-quality photograph. But if you need to change the compression or size of the image, you can always keep a copy of the original in your computer.
We recommend using JPG’s on your web page for full-color photographs. They are easily compatible with websites, and take up less bandwidth without significant loss in quality. Saving a photographic image in PNG, for instance, which is a lossless format, will result in a file double the size of a JPG!
PNG
PNG is also a common image format, but best put to use for graphical images as it takes up more space than JPG’s. This is because PNG uses lossless compression, so optimizing a PNG image will not result in any loss of data or quality. PNG is also good for screenshots and images with less than 16 colors, otherwise, the file size may get overwhelming.
We recommend using PNG’s for graphics, banners, and similar small and simple images. PNG’s are especially great for graphics because unlike JPG’s, they support transparent backgrounds which you can layer with other details. PNG’s will maintain the quality of a simple image but will take up too much space for a photographic image.
GIF
GIF is a format that’s used for small-sized images or icons with limited color. GIFs use lossy compression that eliminates a lot of data. So, if you compress (or save) an image into a GIF, it will lose a good deal of its original quality. Since the difference in compression to a GIF is very noticeable, it’s not recommended for photographs or larger images.
The best thing about GIFs is that they can be animated! You can use an animated GIF to add some razzle-dazzle (as they called it in the 50’s, probably) to your page. But seriously – some amount of tasteful animation with purpose can help attract attention to your website.
TIF
The TIF format is the Cadillac of high-quality images. This, unfortunately, means that it’s no good for websites – it simply eats up too much space on your page. It’s good for print work, but not for your browser. If you want to use a TIF image on your website, you should export it into a JPG and then compress it to optimize the image. You can always keep the original TIF in your PC – so long as you keep it away from your website.
The Bottom Line: Use JPG for photographs, PNG for graphics, text, and line drawings in smaller file size, and GIF for icons and animations. Use TIF… never. Not on your website, that is. Keep that one to yourself!
Like with lossless and lossy compression, you can do some experimenting with image formats, too. Try to follow these general guidelines, but don’t be afraid to mix it up a bit!
With a tiny bit of know-how, you can compress images to look as good as the original, but take up much less space on your web page.
Quick Tip: Your hosting can make a huge difference in your website loading speeds and how quickly images are loaded. We’d highly recommend checking out our cheap WordPress hosting service.
How to Optimize Images for Web and Performance: Tools
We finally arrive at what tools you can use in order to optimize images.
As we’ve covered, successful image optimization means reducing the file size of the image while maintaining its quality. You can do this in a number of ways:
- using online image compressors and optimizers,
- using various desktop image manipulation programs,
- using CMS plugins (like WordPress plugins)
Online image compressors and optimizers
PhotoShop is great for photo manipulation and editing, and a necessary tool in every web designer’s arsenal. But it’s a bit of an overkill to download it and use only for simple image compression. If all you do is compress a couple of images every now and then, you can do this using online image compressors, like Toolur, JPEG-Optimizer or TinyJPG.
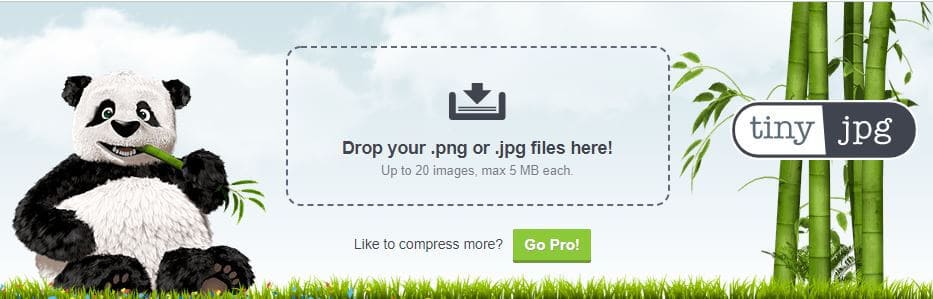
TinyJPG is an easy way to compress your images
Toolur is quite straightforward and easy to use. You can upload images in JPEG, PNG, or BMP format and get them converted to PNG’s or JPG’s. You can select the compression method (lossy or lossless), the percentage of image compression, and even resize the images. Toolur also allows you to bulk upload up to 25 images, each up to 30 MB in size. For a free online tool, that’s quite a generous upper limit.
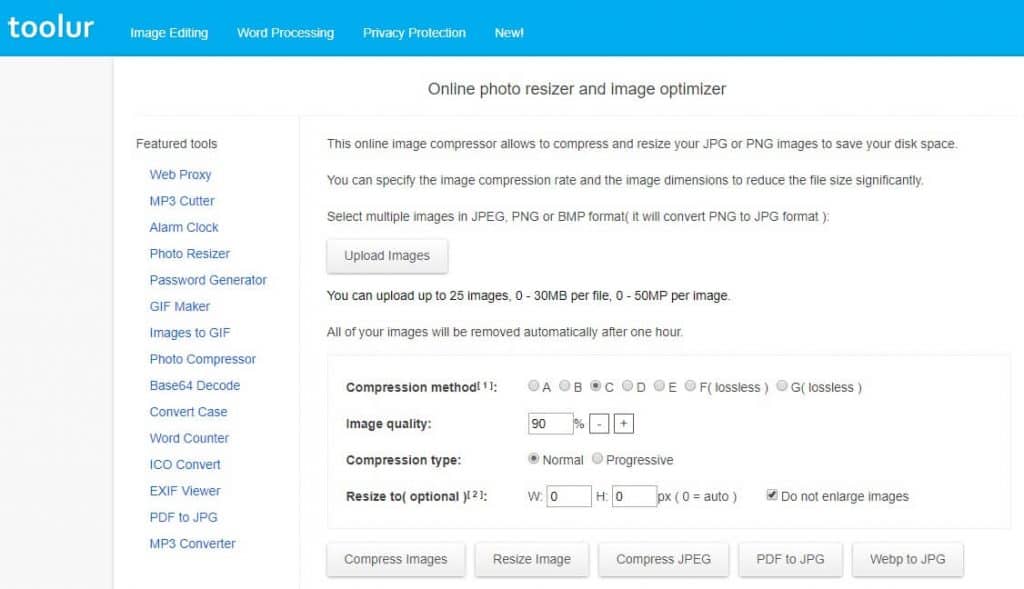
Toolur allows you to select the percentage of the compression, select between lossy and lossless compression, choose a compression type, and even resize the image(s)!
JPEG-Optimizer is another very simple online tool you can use to compress images, but as the name suggests, it only works on JPG’s.
Kraken is an online image compression tool that offers a bit more versatility. You can use it to optimize and resize most image file types: JPG’s, PNG’s, and animated GIF’s.
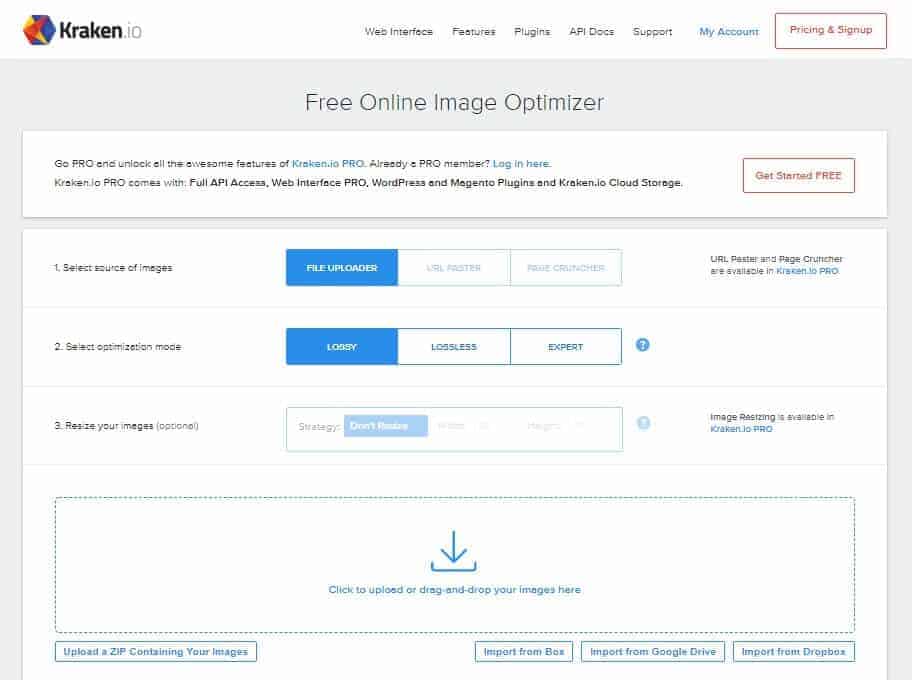
Using Kraken is easy and fast! Drop and compress multiple images at once.
Like Toolur, Kraken allows you to bulk upload photos for multiple optimizations at once. You can then download them in a zip format, or directly export them to your Dropbox or Google Drive. The free version allows compressing images up to 32 MB in size each, and up to 100 MB in total. The premium plans allow you to upload more (500MB, 2GB, 5GB, etc.) for a monthly fee.
These online programs are quite basic and only work to compress an image. If you want a more versatile online image editing tool, you can use Ribbet. You can also download Ribbet for free, or add it as an extension to your browser. Keep in mind that this will require the use of Flash.
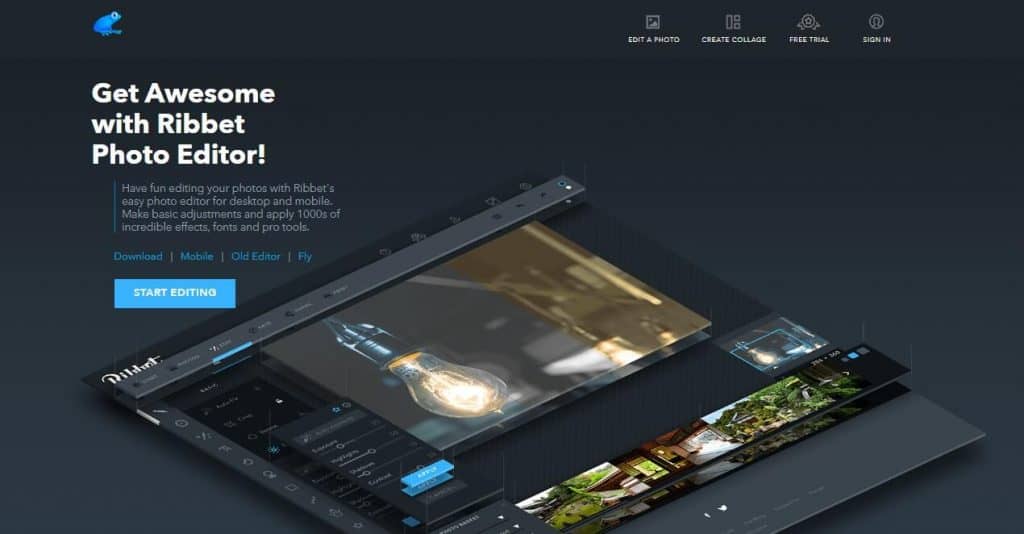
Ribbet is a great online image editor that you can use for free!
Another great online photo editor is Canva. It’s free and really easy to use. It has a similar interface to Photoshop, but you won’t need any prior photo editing knowledge to use it.
You can also use Canva to create all sorts of custom designs for your website!
Simple desktop programs
There are some programs that you already have on your PC or that you can get for free to optimize images. We’re talking programs that take up little disk space and will get the job done.
If you’re using a Mac, the simplest way to optimize an image is to use the Preview app. You just need to go to Tools > Adjust Size > and then save or export as a compressed JPG file. You can resize and also convert images to any file type.
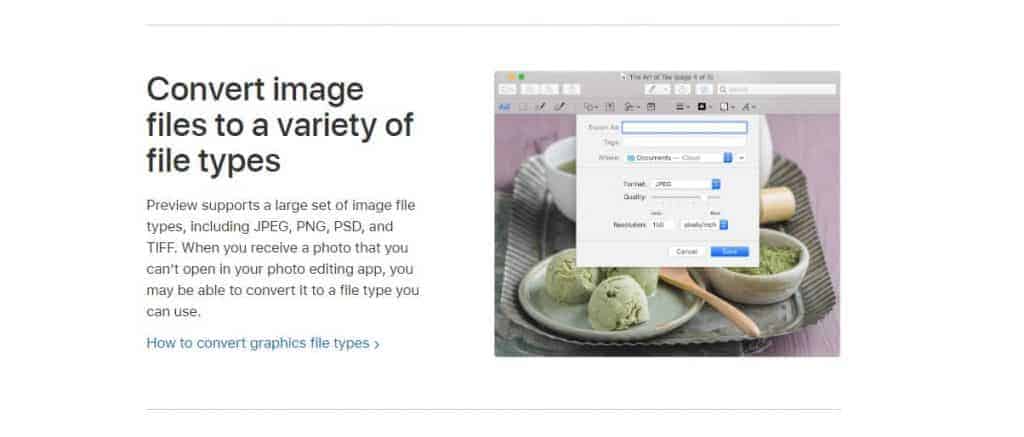
How to optimize images using the Mac Preview app
For Windows, there are two great programs that take up very little disc space and you can download for free. One of them is FastStone. It comes in several different versions you can choose from based on what you need from the photo editor. FastStone supports all popular graphic formats (BMP, JPEG, PNG, GIF, TIF, and so on). You can use it for image optimization and all kinds of editing.
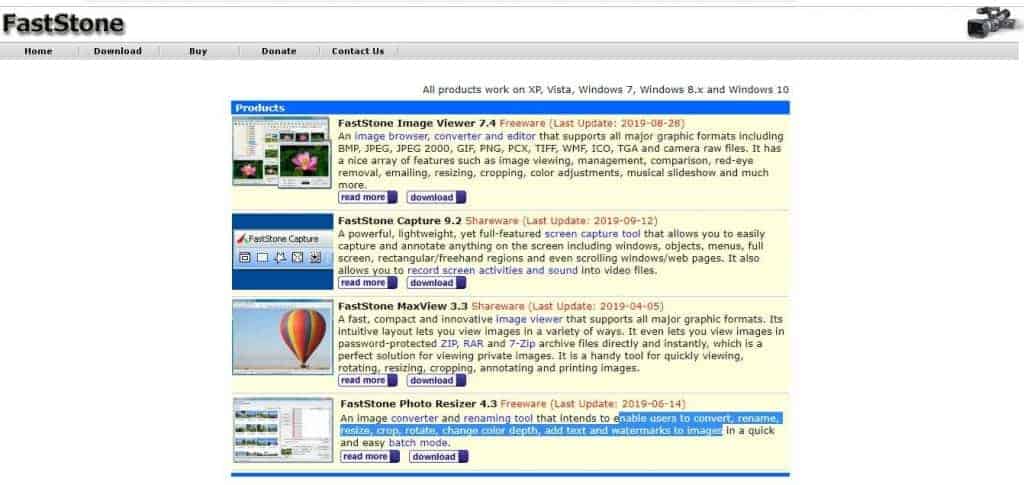
The different versions of FastStone
The other great program for Windows that you can download for free is PIXresizer. PIXresizer is quite basic but very easy to use. It’s the ideal tool for image optimization, as you can use it to compress images so as to optimize them for web and email.
Like FastStone, it supports most main image formats, and you can use it to convert from one file type to another. It also comes with some additional straightforward tools – resizing, color manipulation, and so on.
Advanced Desktop Programs
The two most popular image editors are PhotoShop and Gimp.
Optimizing images in PhotoShop is very easy using their “Save for Web” function. All you need to do is open an image, go to File > Export > Save for Web. This will compress the image to a size that’s acceptable for your webpage.
Gimp is PhotoShop’s less fancy cousin. It basically does the same job, except it’s free! It’s also open-source, so anyone can edit the code, add onto the program, and fix bugs.
To optimize an image in Gimp, go to File > Open > select the image > File > Export As. A dialogue box comes up and you choose the name and extension (ex. JPEG), and click on “Export.” In the resulting dialogue box, select “show preview in image window.” This will give you all the options you need for easy and simple image compression. You can adjust the quality and directly see what size the image would be for that level of compression. You can also play with different types of compression.
Additionally, Gimp now has a plugin for a “save for web” function, like PhotoShop.
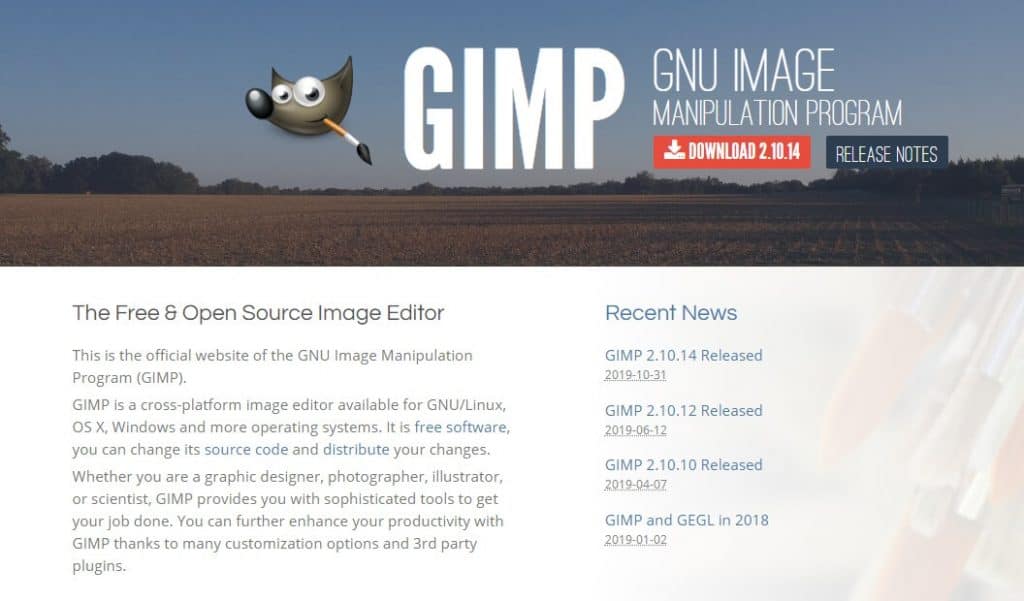
The homepage of Gimp, the best free image manipulation program
Plugins
Content management platforms (CMS’s) offer a variety of free and premium plugins that you can use to directly optimize an image before uploading it to your webpage.
Some examples of plugins that you can use on WordPress, the most popular CMS today, are:
- ShortPixel Image Optimizer
- Imagify
- Imsanity
- Optimhole
- Smush
- And on, and on, and on…
Let’s look at ShortPixel as an example of how these plugins work – although each of them has varying features and specifications.
ShortPixel is a cloud-based image optimizer, so it improves your site’s loading speed without consuming resources on your site’s hosting account to optimize the images.
What does this mean?
ShortPixel is probably the easiest-to-use image optimization plugin. It requires very little work on your end. Simply install it, and click the button to optimize all of the existing images on your WordPress site. It automatically reduces the size of all of the new images that you upload to an acceptable, lowered file size. Generally 30-50% smaller, depending on the image.
You can get ShortPixel in a free or premium version.
Bottom Line: You should optimize your images before uploading them to your website. You can either do this using an online image optimizer or a desktop program. Alternatively, you can use one of many available CMS plugins.
Some require optimization prior to upload, while others, like ShortPixel, do the optimization simultaneously as you go. In other words, they automatically optimize your image as you upload it.
How To Optimize Images for Web and Performance Using Image SEO
Now that we’ve looked at how we can optimize images by manipulating their size, let’s see how we can optimize them by manipulating the image file names and tags.
Creating a Custom Filename
When Google’s algorithm and crawlers go through the entirety of the internet looking for the right information to display, they don’t so much look at the images as they look at image filenames.
We briefly mentioned at the very beginning of this article that if your image of a puppy is named something like img1.jpeg, the chances of it showing up in a SERP are very slim.
To improve your chances of bringing your image – and thus your website – closer to the front of the search results, make sure to give your image a relevant filename.
For instance, if you’re showing an image of the Taj Mahal at sunset, your filename should be taj-mahal-sunset.jpg. Notice here that:
- The keywords of the image – the Taj Mahal – is at the very beginning of the image filename. It’s the principal subject on the photo, and that’s why it should be the very first thing written in the filename.
- Avoid stop words that don’t add much to the meaning. For instance, the name isn’t the-taj-mahal-at-sunset. “The” and “at” are fluff in this case, and unnecessary. As Michael Scott says, KISS (keep it simple, stupid).
- Use hyphens, i.e. dashes to separate the words of the image filename. Google’s Matt Cutts gives some pointers about why dashes are preferred to underscores in website URLs during a Chrome search. The same goes for image filenames. Here’s a video of him talking about it, if you don’t feel like reading.
An additional tip concerning the filename would be try to include the web page’s target keyword in the image filename.
For instance, if you’re selling products on your website, and it’s an image of a product, name it using your brand name (target keyword) and the product itself. Let’s say you’re selling lava lamps and your brand is called Psychedelic, the image filename should be psychedelic-lava-lamp.jpeg.
Pro Tip: In this particular case, you may get even more visits from people actually Googling psychedelic lava lamps and not your brand in particular. Neat, right? Try getting a frequently used word in your product or brand name.
Bottom Line: Customizing the image filename is very easy and you shouldn’t skip out on it. Although your site visitors won’t see it, it will give search engines more data about the information offered on your page!
Use Alt Tags
Alt tags are generally not seen by website visitors, but detected by search engine crawlers. This will help bring your website further forward in the SERPs.
Alt tags, also known as “alt text” or “alt descriptions,” are a written copy of the image that will appear in place of the image if the website fails to load it to the screen. The visitor can see what the image should have been, and the crawlers see it when searching your web page, thus improving your ranking.
You can add alt tags through your CMS, like WordPress. In most CMSs, when you click on an image in your blog post, you get a window with Image Options. The window includes a text field entitled Alt text, where you can type in the alt tag.
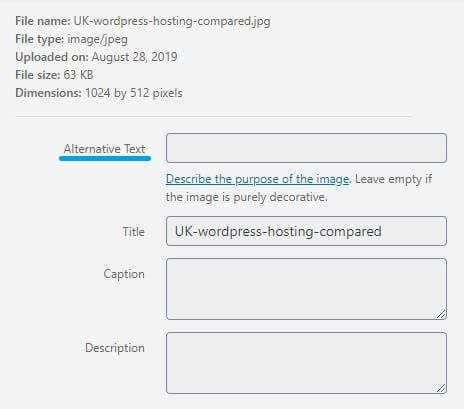
Add an alt tag in WordPress using the Alternative Text box
You can also directly change your alt tag from the page’s HTML source code, by finding or adding alt=“alt text” to the code. For example:
alt=“Psychedelic lava lamp”
Use Effective Captions
Captions are insanely crucial in the set up of your web page.
Neil Patel himself says that captions are read four times more than the body of the text.
In fact, when visitors skim a web page, they pay the most attention to headlines, quotations, and captions. If your images lack effective and descriptive captions, you’re missing out on an easy way to captivate attention and get your message across.
If you can’t think of a way to properly caption an image, Patel argues that it means it probably doesn’t belong on your page.
Rather, the caption should contribute to the story. It should contain a subject which is integral to what you’re telling. It should move the plot along. It should move your reader along, giving them a better idea of what they’re looking at, and what to expect from the rest of your text.
Bottom Line: Make sure to caption the images on your web page. Captions are one of the main things that site visitors will look at when reading your page! If the caption is good, they may stick around to find out more.
Conclusion
We’ve covered why it’s so important to optimize images – it will significantly improve your site’s rankings and the user experience.
Now that you know how to optimize images for web and performance, you needn’t worry any longer about it being difficult! You saw how easy it is to do. Plus, there’s a plethora of ways and thousands of programs you can choose from.
In the end, it’d really be a shame to have a near-perfect website that doesn’t get the credit it deserves just because your images are not optimized.

How To Redirect Your WordPress Site from HTTP to HTTPS
The internet has arguably made a lot of things more convenient for us. From paying bills, to online shopping, academic research, and entertainment – there’s little you can’t do with a computer and an internet connection. However, this also…

3 Ways to Defer Parsing of JavaScript on Your WordPress Website
When a visitor opens your WordPress website, their browser displays its content by fetching it from top to bottom. If it comes across JavaScript, it will stop retrieving the content until it fully loads and parses the JavaScript file on the…
3 Ways To Enable GZIP Compression on Your WordPress Site
Since Google’s speed update in July 2018, speed has become an important factor in website rankings on mobile searches. In fact, if you’re running your own website, you probably already know that having a fast-loading website is important both…